Software Trending News – Guaripete | Online Store |
- How to watch live broadcast TV on your Apple TV without cable
- Get the $40 Gaiam Evolve Balance Board for Standing Desks at its lowest price ever
- How to use your amiibo with Nintendo Switch
- Today’s Apps Gone Free: Pulse Breathing, American Almanac, Portrait Painting and More
- Weekend poll: How do you feel about the changes to Snapchat?
- Google releases optional security update for Chromebooks, but it wipes all local data
- The Pixel 2 charges much more slowly below certain temperatures, but it doesn’t tell you that
- Si te aburriste de las recomendaciones de Spotify, en esta web puedes descubrir y generar mejores listas de reproducción
- View Image for Google Images extension for Firefox and Chrome
| How to watch live broadcast TV on your Apple TV without cable Posted: 18 Feb 2018 12:05 PM PST 
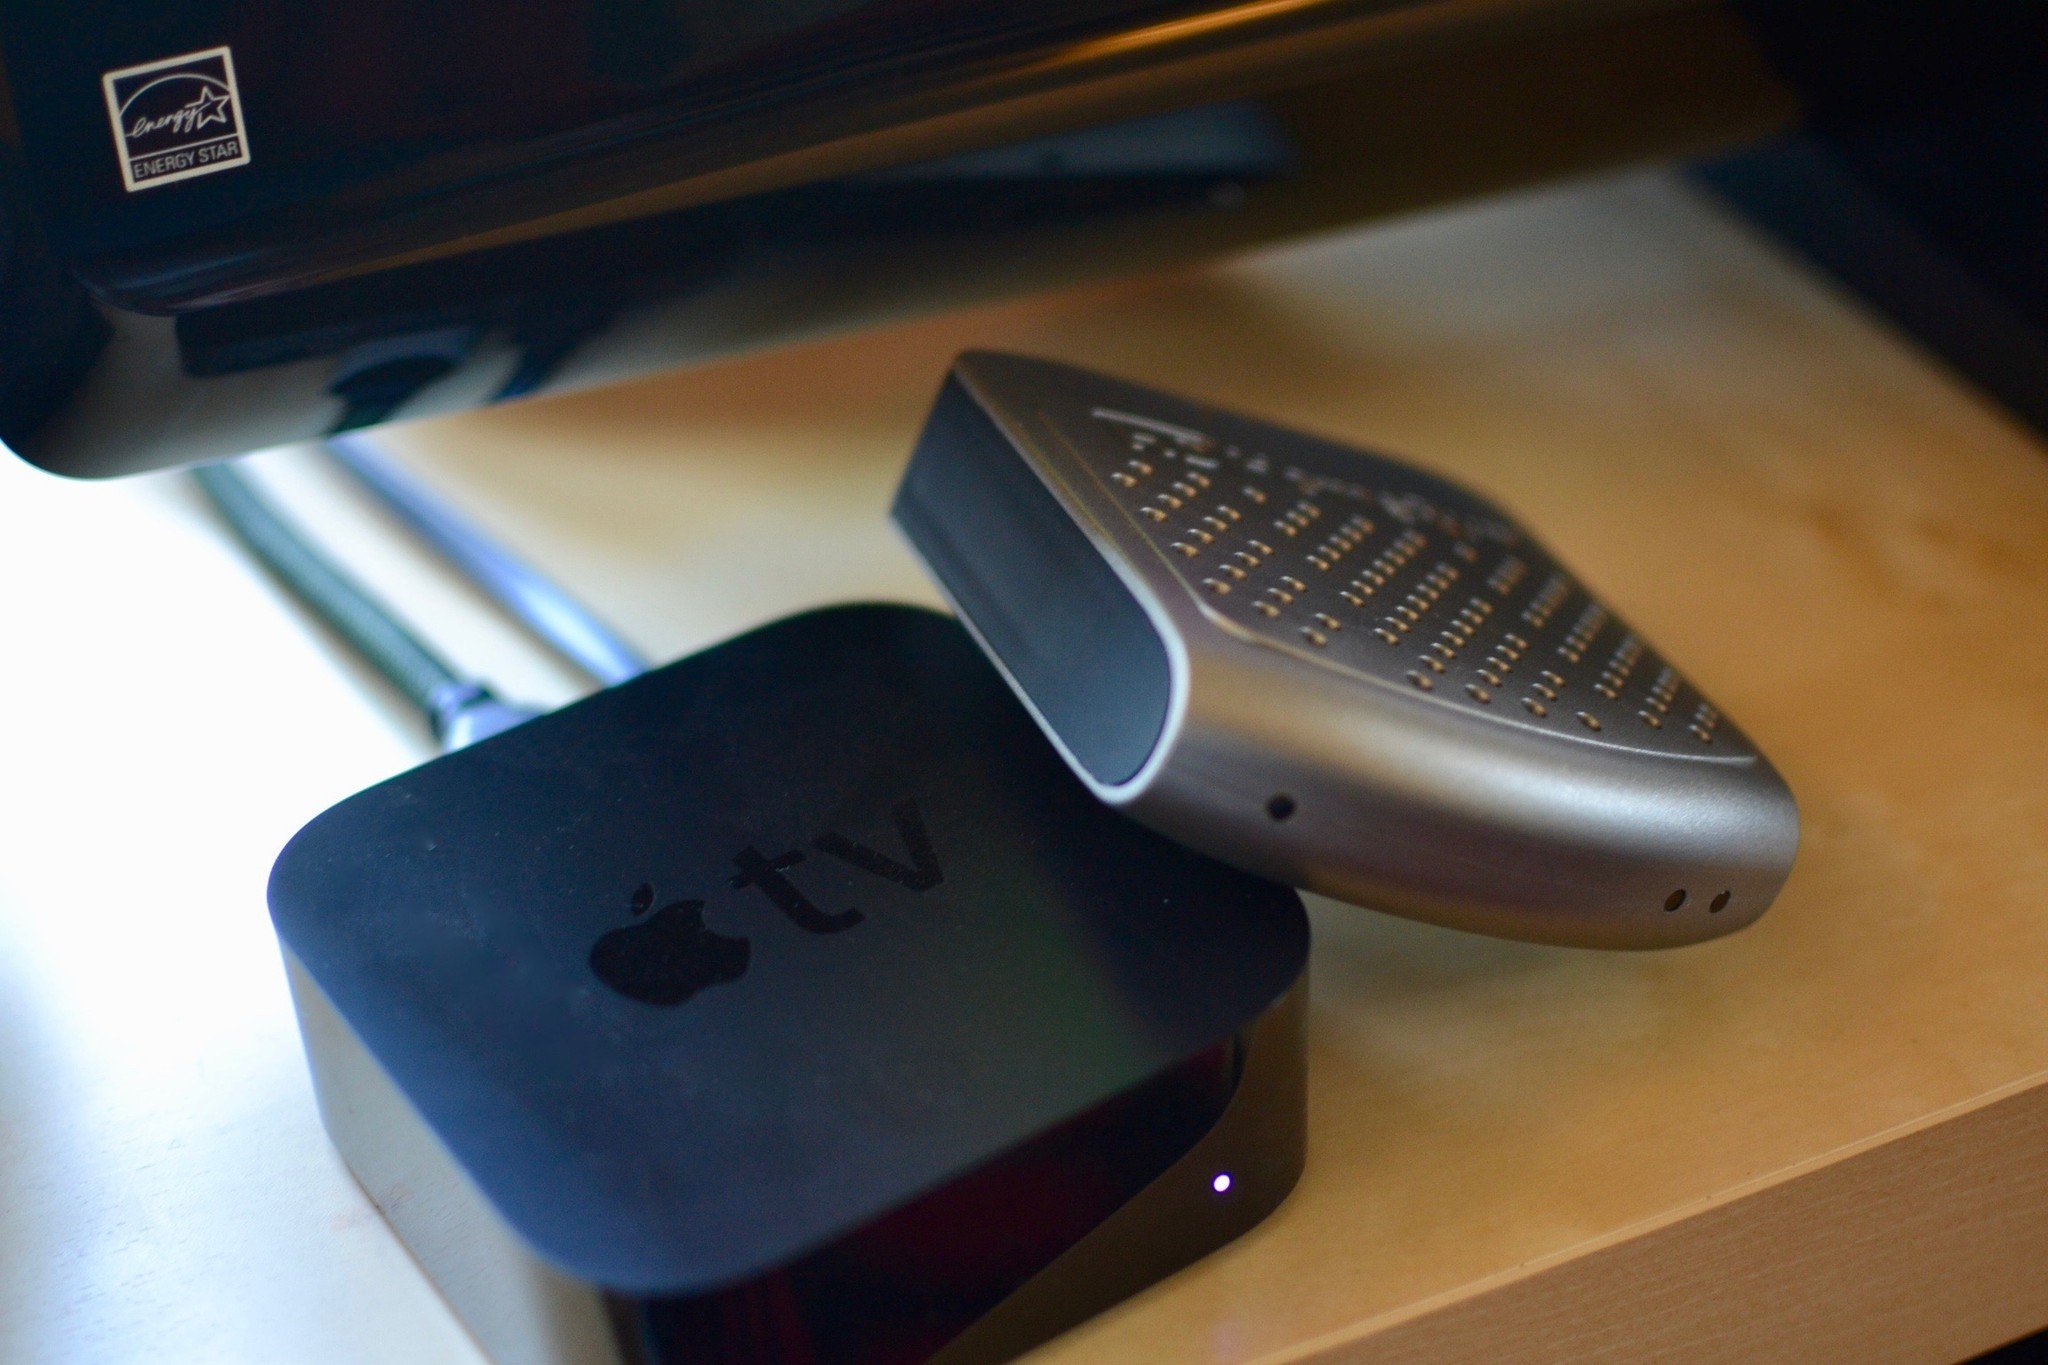
Being a cord cutter (actually, I’ve never had cable, so I haven’t technically cut any cords), I’m always on the hunt for new ways to keep myself entertained. On Apple TV, I use a handful of apps that, either I subscribe to a streaming service for (like Hulu and Netflix), or offer a free streaming TV feature that doesn’t require a cable subscription (like PBS and The CW). For those looking for “cable lite” in the form of small packaged cable subscriptions from services like Sling TV and DirectTV Now, we’ve got a list of the best streaming live TV services. Keep in mind, though, that most of these services don’t offer unlimited access to broadcast channels like NBC, CBS, ABC, and Fox. What I’m referring to is the ability to watch any broadcast channel available in your area. There is also this thing called broadcast television, which anyone can watch as long as they have a TV that supports digital television (or a digital conversion box) and an over-the-air (OTA) HDTV antenna. The thing about broadcast television is that I couldn’t watch it on Apple TV. I’d have to switch my TV input over, and then flip through the channels until I found something to watch. I rarely watched broadcast television because I tend to stick with Apple TV for my TV and movie watching activities. That is until I got HDHomeRun. With HDHomeRun, not only can I watch live broadcast television on my Apple TV, I can also watch it on my iPhone or iPad. Plus, with a subscription, you can record live TV and watch it the way a person with cable and a DVR would watch TV. Skip those commercials! There are a few options for broadcast television transmitters, but from my experience, HDHomeRun is the most versatile with other third-party apps like Plex, Emby and Kodi. I’m going to explain a little bit more about what HDHomeRun is and how to set it up. What is HDHomeRun?
It’s a box, about the size of an Apple TV, maybe a little smaller, that acts as a transmitter. When connected to your internet router and your OTA antenna, it makes it possible for you to watch live TV on any other device that is also using the same internet connection. Here’s how it works: You connect an ethernet cable to your home’s internet modem. Then, you connect your OTA antenna to it (the antenna does not need to be connected to your TV set). Then, you plug it into a power source. Then, using the companion app on your iPhone, iPad, or computer, you scan for local channels, just like you do when setting up broadcast television on your TV set. Then, you watch TV. You can start watching TV on your computer right away when you download the official HDHomeRun app on your Mac or iPhone and iPad. If you want to get broadcast television on your Apple TV, you’ll have to download a third-party app. I highly recommend Channels. With the app installed on your other devices, all you have to do is open the app, scan for your HDHomeRun, and start watching live TV. Why would I want HDHomeRunFirst off, you’re probably only going to be interested in using HDHomeRun if you are a cord cutter (if you don’t have a cable subscription). There is an HDHomeRun box specifically for people that have a cable subscription, but I’m focusing on people that don’t pay for cable and want to watch broadcast TV on their iPhone, iPad, Mac, or Apple TV. You might be asking, “How is this any different from simply watching CBS, NBC, or ABC on my TV?” Because that’s what I asked, at first. Actually, there are two main benefits to using HDHomeRun as a broadcast television channel transmitter. The obvious benefit is that you can watch broadcast television on any supported device in your house, including computers, smartphones, tablets, Xbox One, set-top boxes (like Amazon Fire TV and Apple TV), and other media centers that support such apps as Plex, Emby, and Kodi. You don’t just have to watch TV on your TV. You can watch it anywhere. A second benefit is that, with the HDHomeRun DVR subscription, you can record live TV and watch it when you want, even when you don’t have an internet connection. Even app channels for Apple TV don’t offer that — cable subscription or not. If you’re the type of person that would only watch broadcast television on your TV set and don’t care about being able to record shows to watch later, HDHomeRun is not the set up for you. If, however, you like the idea of watching your local news on your Mac, iPhone, iPad, or Apple TV, or you want to be able to record live TV and watch it at your leisure without needing a cable subscription to do so, you should think about investing in HDHomeRun. What do I need in order to watch free live TV on my Mac, Apple TV, iPhone, or iPad?
Most importantly, you’ll need to be living in a country that supports digital TV that receives either ATSC, DVB-T and DVB-T2, DVB-C or QAM. You’ll also need the HDHomerun box.
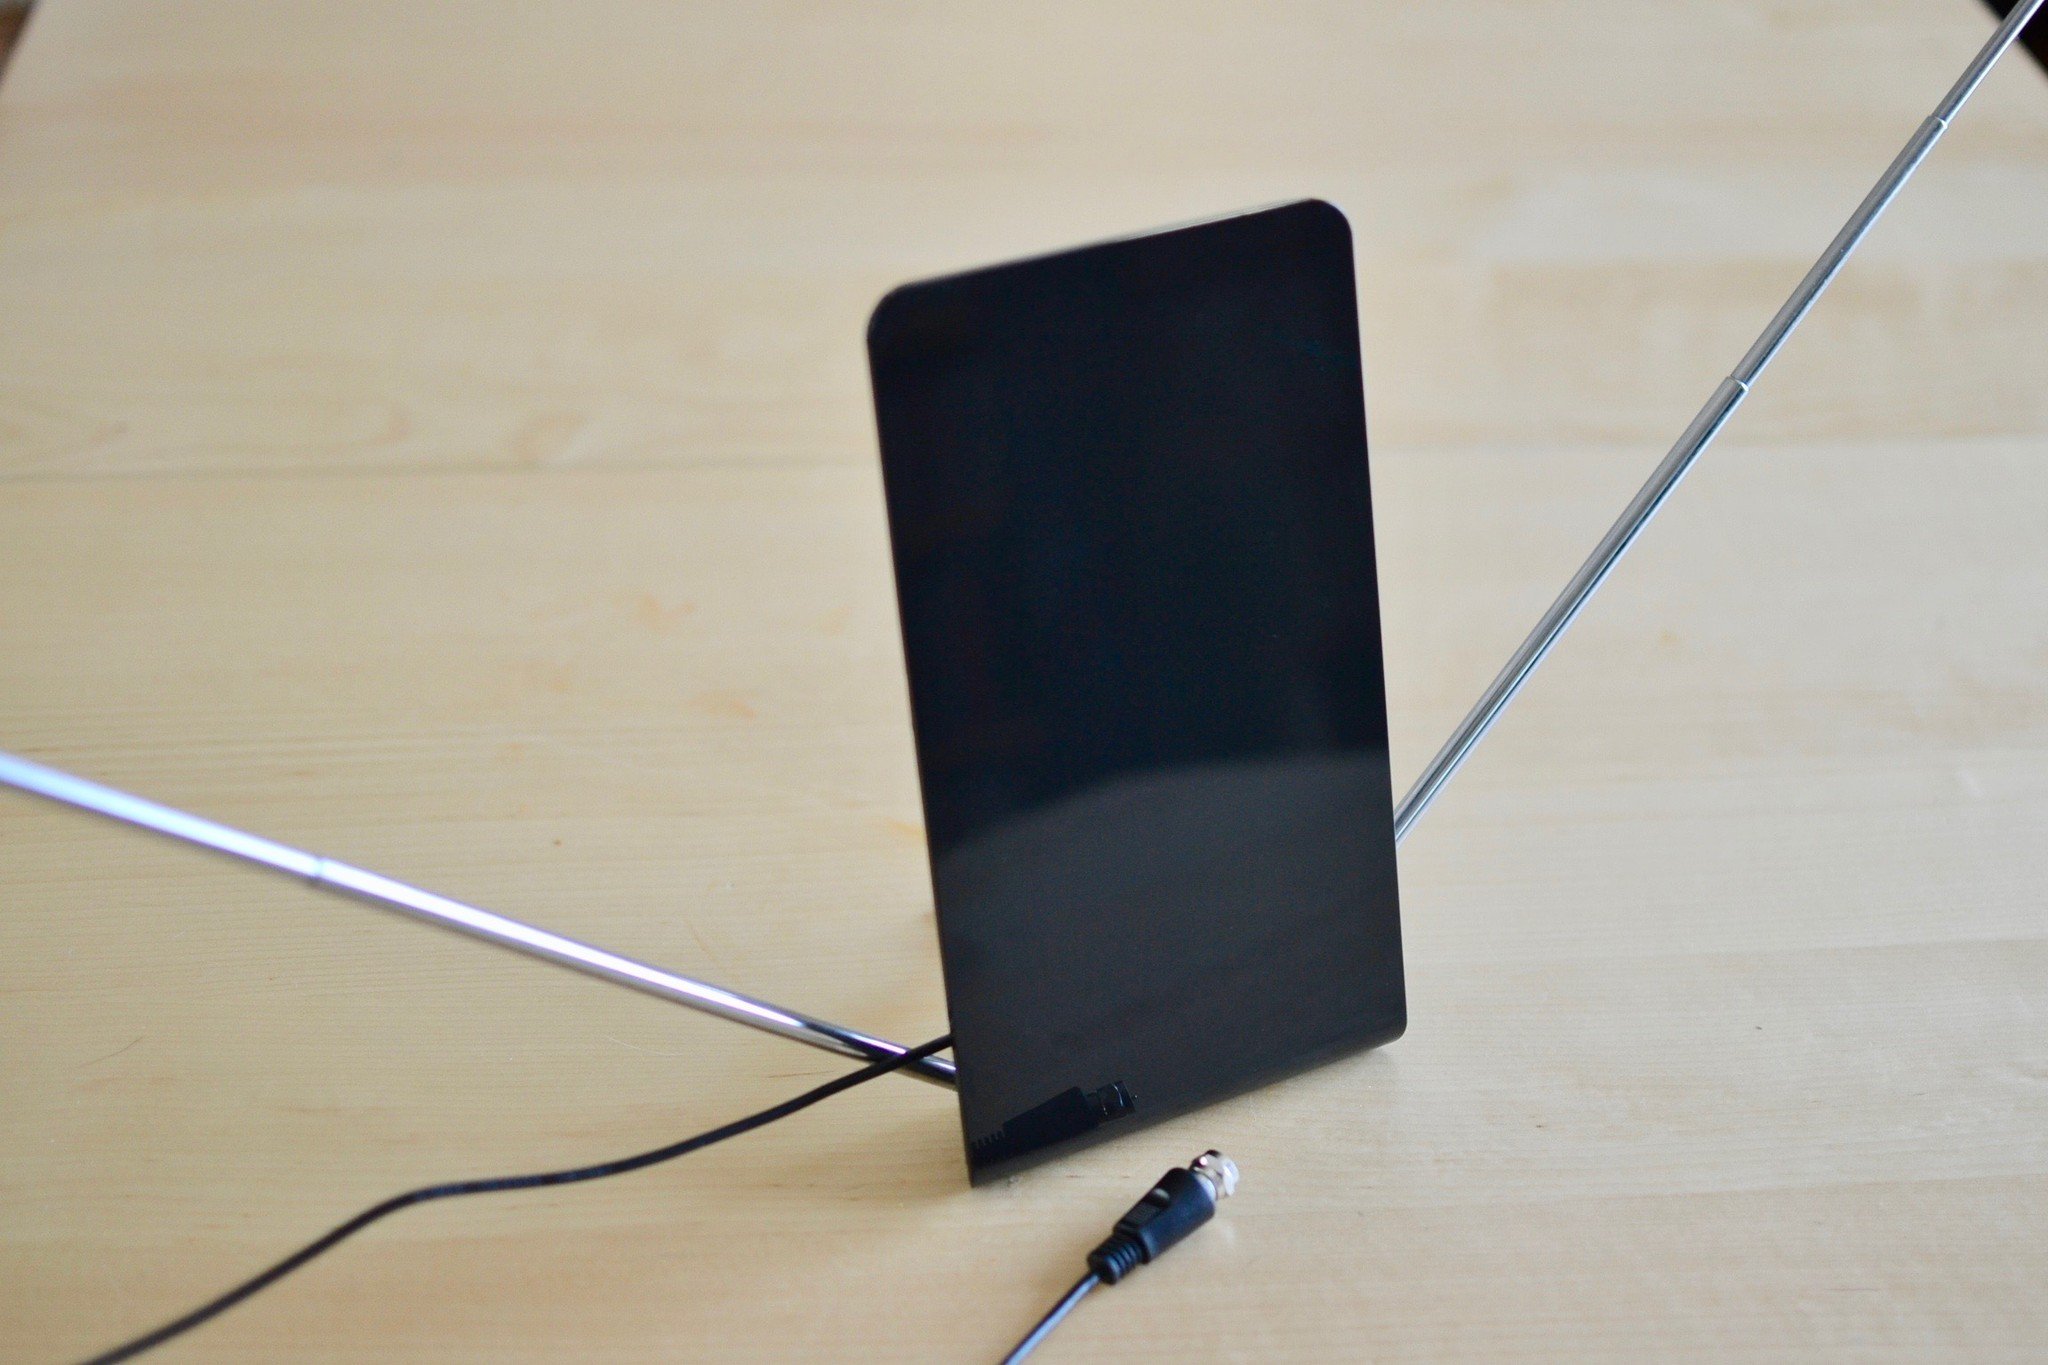
If you don’t already have one, you’ll need an over-the-air HDTV antenna with a coax connector that is able to work as a receiver in your area. Depending on how far away you are from your local channel broadcast center, you might only need an indoor antenna, which you can get for about $15 – $30, or you might need an attic or outdoor mounted antenna, which could cost as much as $150. You can figure out which type of antenna you’ll need by using TV Fool’s signal locator.
If you’re on the Apple ecosystem, you’ll also need to download the HDHomeRun app for Mac, iPhone or iPad. HDHomeRun is not yet compatible with Apple TV. However, there are a variety of software options that range in price from a few dollars up front, to a monthly subscription. It all depends on what you want or need. My preferred app for watching live TV on Apple TV is Channels for Apple TV, which costs $24.99. The iPhone and iPad version costs $14.99 (and you do have to buy them separately). It has a few extra features — it records up to 30 minutes of a channel you’re watching so you can pause it and come back later (great for skipping commercials). You can also use Plex with your Plex Pass subscription, Emby with your Emby Premier subscription, or Kodi if you side load it to Apple TV. These apps are great for DVR recording, but require a little bit of set up and a subscription for the former two. If you don’t already use Plex, Emby, or Kodi, you may want to stick with Channels. If you do plan on recording full episodes of shows or movies, you’ll also need a hard drive with 6-8 GB of disk space per hour of recording. So, you might need to invest in a 1, 2, or 3 TB external hard drive to store your shows, which range in price from $25 – $130, depending on how much live TV you want to record and watch later. How do I set up HDHomRun?It’s easier than you think, but SiliconDust, the company that makes HDHomeRun didn’t do a very good job of explaining how to set it up. The simple instructions are actually a tad bit too simple. Here’s a little more detail on what you’ll need to do. The first thing you should do is suss out where you’re going to set up the HDHomeRun. The box needs to be connected to your modem, the antenna, and a power source at all times, though none of it needs to be connected to your television set or computer. Be sure you’ve got a good location to set everything up. The next thing you should do is disconnect your OTA HDTV antenna from your TV set if you haven’t already. It doesn’t need to be connected to it anymore It doesn’t even have to be in the same room as your TV set. Instead, connect your antenna to the HDHomeRun box using the coax cable.
Next, connect the HDHomeRun box to your home modem or router using the included ethernet cable. Just plug one end of the ethernet cable into the box and the other end into the ethernet port on the modem or router. The HDHomeRun will always need to stay connected to the modem or router, so make sure you’ve got room nearby to set up the box and antenna. You could also invest in a longer ethernet cable if you need to.
Then, plug the box into a power source. Any old wall plug will do. After you see a solid green light on the HDHomeRun box (just below the ethernet port), go to myhdhomerun.com to scan for channels in order to prepare to watch live TV.
Last, download the necessary software. You can download a compatible app for your Mac right from myhdhomerun.com. You can also download the HDHomerun app for iPhone and iPad. On Apple TV, you can use Plex with your Plex Pass subscription or Emby with an Emby Premier subscription, or you could also side load Kodi and use the HDHomeRun add-on. If you don’t already use Plex, Emby, or Kodi on your Apple TV, you should probably get Channels for Apple TV (my personal recommendation) or InstaTV Pro.
Once you open one of the apps, the channels should automatically populate for your viewing pleasure. If you don’t see your channels, you can rescan from within the app and you should see them after that. Any questions?Do you have any questions about what HDHomeRun is, how it works, or how to set it up? Put them in the comments and we’ll help you out. Updated February 2018: Updated available HDHomeRun boxes and included information regarding the HDHomeRun app for iOS. Main
Powered by WPeMatico The post How to watch live broadcast TV on your Apple TV without cable appeared first on Guaripete. | ||||||||||||||||||||||||||||||||||||||||||||||||||||||||||||||||||
| Get the $40 Gaiam Evolve Balance Board for Standing Desks at its lowest price ever Posted: 18 Feb 2018 12:05 PM PST This balance board is fit for offices with standing desks, clerks, cashiers, and anyone who stands for long periods of time. The rocking motion creates a low-impact movement that engages your muscles in the back, core, legs, and ankles. The design is ergonomic and promotes neutral positioning with a non-slip texture is secure on hard floors and carpet. It has received 3.9 out of 5 stars based on 68 customer reviews. Powered by WPeMatico The post Get the $40 Gaiam Evolve Balance Board for Standing Desks at its lowest price ever appeared first on Guaripete. | ||||||||||||||||||||||||||||||||||||||||||||||||||||||||||||||||||
| How to use your amiibo with Nintendo Switch Posted: 18 Feb 2018 12:05 PM PST
Amiibo, those adorable tiny statues that take up too much space on your bookshelf and inevitably become a pressure point in your relationship when your significant other complains that you’re becoming addicted to collecting them. Well, there not just for looks. They serve a very useful purpose in Nintendo Switch games. They generate items, sometimes exclusive items, within a game that you’re playing. Want to dress your Skyrim character like Link? It’s possible with the right amiibo! How amiibo work with Nintendo Switch
Amiibo have this tiny chip at their base. The chip stores identifier data, like which Switch the figurine is registered to, which rewards should be doled out in which games, and whether it’s already been used in a particular game that day. The chip in the amiibo uses Near Field Communication (NFC) to send this information to a small NFC reader in your Switch’s right Joy-Con controller (or the Pro Controller). When you place the amiibo on joystick on the right Joy-Con, it’ll send the data to your Switch. How to set up amiibo on Nintendo Switch What happens next depends on which game you’re playing. In some games, you might get special powers. In others, exclusive outfits or in-game currency. How to trigger the in-game rewards in different gamesWith all these cool, exclusive in-game items you can get, you might be wondering how to go about getting them. Unfortunately, it’s not always as simple as just tapping your amiibo to your Joy-Con and something suddenly appears on the screen. Nintendo wants to immerse you in the game you’re playing, which means triggering an amiibo’s action has to fit the game’s design. In some games, you’ll have to go through a couple of steps before your bag of loot appears in front of you. How to use amiibo with The Legend of Zelda: Breath of the Wild
Before you can use your amiibo in BotW, you have to enable the ability. It’s off by default in your system settings.
After you’ve enabled the ability to use amiibo, you can trigger the rewards any time.
The loot will fall on the ground in front of you so make sure you’re not on a hillside or the edge of a river. How to use amiibo with Super Mario Odyssey
You’ll have to complete the first two kingdoms in Super Mario Odyssey before you can start using amiibo. In the Sand Kingdom, after you’ve beaten the Broodals, head back to your ship. A new object will be nearby. It looks like a little satellite with a Toad hovering over it. That little satellite is Uncle Amiibo and once you speak to him, you’ll be able to trigger your amiibo anywhere in the kingdom at any time.
Loot will pop up from Mario’s head and automatically be added to your inventory. Note: It’s a good idea to check in with Uncle amiibo whenever you come across him. He provides some bonus help by locating Moons that you haven’t already found. Nice bonus. How to use amiibo with Splatoon 2
To unlock new characters in Splatoon 2 (like Callie and Marie) or get some cool gear, you can find the amiibo trigger in your amiibo Box in the back of Inkopolis Square.
With amiibo in Splatoon 2, you can befriend these characters, which could give special gear that makes you harder to get splattered. How to use amiibo with Mario Kart 8 Deluxe
With Mario Kart 8 Deluxe, you can unlock some sweet new outfits to match the amiibo you’re triggering.
As you scan compatible amiibo, new suits will appear. To wear one, select your Mii Avatar when choosing a driver. Then, select the outfit you want to wear. How to use amiibo with Skyrim
In Skyrim, your amiibo will drop a loot crate that will provide some helpful armor, gear, and noms. Some amiibo, especially the ones from The Legend of Zelda series, will reward exclusive items that are difficult to find in the game.
A loot chest will drop in front of you so make sure you’re not on a hillside or near a deep body of water. Which amiibo should you buy?
So, now that you know how cool amiibo are and how they can reward you with some pretty sweet in-game swag, you might be wondering where to start? Have no fear. Just find the games you love and get started. For the true amiibo collector
If you’ve been a collector of amiibo for a while, you probably already have more than a few collector figurines. If you’re looking for some good peripherals for your amiibo, look no further. Any questions?Do you have any questions about how to use amiibo on Nintendo Switch? Put them in the comments and I’ll help you out. MainPowered by WPeMatico The post How to use your amiibo with Nintendo Switch appeared first on Guaripete. | ||||||||||||||||||||||||||||||||||||||||||||||||||||||||||||||||||
| Today’s Apps Gone Free: Pulse Breathing, American Almanac, Portrait Painting and More Posted: 18 Feb 2018 12:05 PM PST  Reduce stress and fall asleep, view the cycles and seasons of nature, and appreciate works of art with today's collection of apps. All app prices are subject to change at any time and without notice regardless of stated free duration. Price changes are solely under the control of the developers.
Pulse Breathing ($0.99 → Free, 13.0 MB): Reduce stress and fall asleep with Pulse. Those who have issues letting go. Pulse utilizes proven breathing techniques to help you unwind. You're able to choose from sleep, relaxation, and stress release techniques. When you're ready, hit start and follow along with the visual prompts. The app includes a breathing reminder, session statistics, and a vibration option. Pulse Breathing is available for free for a limited time. It has a 4.5-star rating with a total of 196 ratings.
Portrait painting HD ($1.99 → Free, 89.4 MB): A collection of 1,187 portrait paintings by some of the greatest artists of all time. Connoisseurs of art. The collection of 1,187 paintings can be broken down by style or by name. You can also search for specific paintings by artist. You'll find only the best paintings from prominent artists like Van Gogh, da Vinci, Vermeer, and Monet. Paintings can be saved as favorites for quick access later on, and you can even save them to your library. Portrait painting HD is available for free for a limited time. It has a 4.5-star rating with a total of 6 ratings.
Frugi – Home Budget ($3.99 → Free, 13.9 MB): Find out where all of your money is going with Frugi. Those on a budget. Frugi is all about speed. Every transaction can be entered in less than three seconds. Simply swipe down to add to or subtract from your total balance. Tap to edit any transaction and double-tap to copy. Transaction history is kept as a running list, and you can review summaries and compare months with just a tap. The app also includes support for tags, search, iCloud backup, and a widget. Frugi – Home Budget is available for free for a limited time. It has a 4.5-star rating with a total of 245 ratings.
American Almanac 1 ($1.99 → Free, 25.2 MB): Replace your old paper almanac with American Almanac. Anyone interested in the seasons. American Almanac is your guide to the cycles and seasons of nature. It features a long range weather forecast along with historical averages. You're also able to observe sunrise and sunset times, moon phases, celestial events, garden planting dates, odd holidays, historical events, and even astrology data. A favorites section allows you to get a glimpse at the data that matters most. American Almanac 1 is available for free for a limited time. It has a 4.5-star rating with a total of 576 ratings. That concludes today's issue of Apps Gone Free. If you like staying on top of these daily deals, don't forget to check out our free AppsGoneFree app.
It provides all the deals each day, and even an archive of past deals that are still active. Developers:If you are a developer who would like to get your app included in our "Apps Gone Free" daily lists, here's our basic set of rules:
To submit an app, simply send a request to [email protected] with the subject "Apps Gone Free." Please include the name of the app, a link to it in the App Store, when and for how long you intend to offer the app for free, and anything else you would like to share. We will take it from there. Powered by WPeMatico The post Today's Apps Gone Free: Pulse Breathing, American Almanac, Portrait Painting and More appeared first on Guaripete. | ||||||||||||||||||||||||||||||||||||||||||||||||||||||||||||||||||
| Weekend poll: How do you feel about the changes to Snapchat? Posted: 18 Feb 2018 12:05 PM PST
Snapchat may not have the widest audience compared to social juggernauts like Facebook, but there’s a core of users that have stuck by the service even as competitors like Instagram integrated similar features. Of course, we’ve been more than a bit critical of Snapchat and it’s terrible Android performance over the years—late last year the company promised to (finally) make an effort on the platform. But over the last week, Snapchat has been rolling out a controversial new redesign. In fact, the reception has been so poor that over 1.2 million people (at the time of writing) have signed a petition to revert the change. How do you feel about the changes? If you give a search over on Twitter for Snapchat, a good number of the tweets you’ll see are still complaining about the new design and spreading instructions for how to trigger the old interface. People that use the app seem pretty upset about the changes generally, even though Snapchat CEO Evan Spiegel has doubled down, saying “Even the complaints we’re seeing reinforce the philosophy. The frustrations we’re seeing really validate those changes.” Personally, I haven’t used Snapchat in years, so these changes have no effect on me. The only one of us here at AP to use Snapchat even semi-regularly is Richard, and he wasn’t too terribly bothered by the changes, though some of his friends were. Either way, we millennials are a pretty fickle group, and having to re-learn how to use an app seems like a good way to drive people to the welcoming and familiar arms of Instagram. What’s your opinion?
Powered by WPeMatico The post Weekend poll: How do you feel about the changes to Snapchat? appeared first on Guaripete. | ||||||||||||||||||||||||||||||||||||||||||||||||||||||||||||||||||
| Google releases optional security update for Chromebooks, but it wipes all local data Posted: 18 Feb 2018 12:05 PM PST  Chrome OS is one of the most secure desktop operating systems on the market (privacy concerns about the Google ecosystem aside). Automatic system updates, verified boot, and system drive encryption all keep your Chromebook safe from attacks. Most models also use a Trusted Platform Module, or TPM, for generating the cryptographic keys that protect local data. Sadly, nothing is 100% secure, and the same is true for some Chromebooks. Security researchers recently discovered a bug in certain versions of the Infineon TPM firmware, which allows hackers to potentially brute-force a Chromebook to obtain encrypted data. Thankfully, the scope of the vulnerability is limited, since the researchers estimated it would take around 140 CPU years to break a single key. The bug potentially affects all Chromebooks using the newest Infineon TPM chip, and there are quite a few of them. Here’s the full list: If you have one of the above devices, you can check what TPM firmware you have by going to chrome://system, searching for ‘TPM’ in the page (CTRL + F), and clicking the Expand button next to TPM Version. If your Chromebook has any of these versions, you are vulnerable:
Because of how the TPM module works, updating the firmware requires you to wipe the computer, so Google has decided to make the update optional. If you want to be as secure as possible, select Powerwash from the system settings. Once you reboot to finalize the reset, click the checkbox that says ‘Update firmware for added security.’ Then confirm the wipe, and you’re all done. I did the whole process on my ASUS Chromebook C302, and it only took about a minute. Sadly, wiping your Chromebook is more of a pain with the advent of Android apps, since most of them don’t backup user data to the cloud (like the rest of the OS does). Unless your Chromebook contains government secrets, you probably don’t need to install the update, but a few minutes of inconvenience while setting everything back up is probably worth being as secure as possible. Powered by WPeMatico The post Google releases optional security update for Chromebooks, but it wipes all local data appeared first on Guaripete. | ||||||||||||||||||||||||||||||||||||||||||||||||||||||||||||||||||
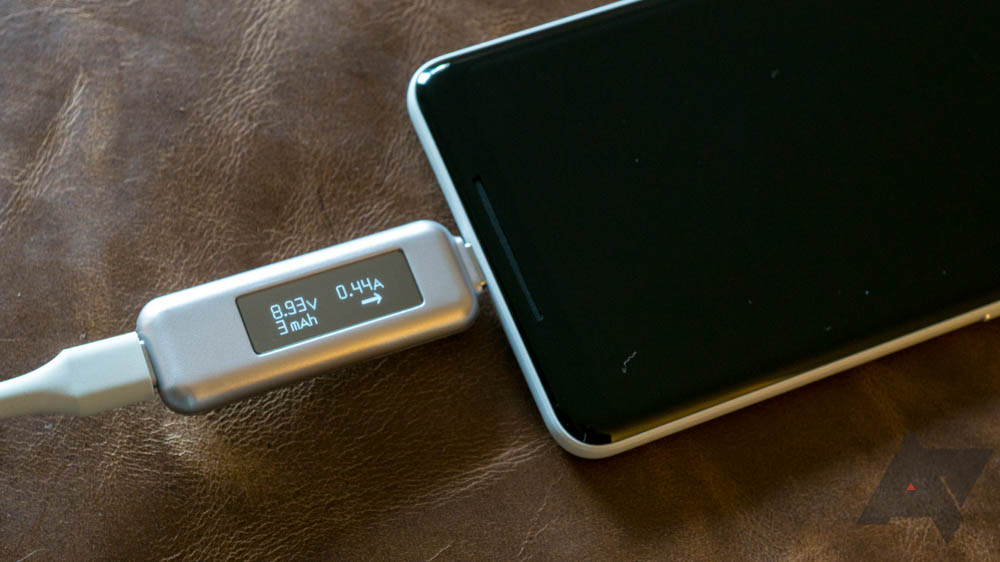
| The Pixel 2 charges much more slowly below certain temperatures, but it doesn’t tell you that Posted: 18 Feb 2018 12:05 PM PST  Battery advancements haven’t kept in step with performance improvements, but the charging tech for topping those cells up has come a long way. Now, most phones come with some flavor of quick-charging technology that promises to fill our capacious flagships in arbitrarily small periods of time. But in the case of Google’s Pixel 2 XL, it turns out that its “Charging rapidly” notification isn’t always an accurate statement. In low temperatures, Google’s flagship will claim to be charging quickly (10W+) when, in fact, it’s actually charging at less than 4W.
The Pixel 2 XL charging at below ~20°C (68°F) We were tipped off about the issue by a few of our readers, and though reports and our own tests only confirm this for the 2 XL, we don’t know if the smaller Pixel 2 is also affected. None of us here at AP had ever personally experienced the problem, but that is due to the circumstances required to trigger it. Turns out, if the Pixel 2 XL’s battery temp is below about 20°C (68°F), instead of pulling the maximum charging speed (18W then falling to 10.5W), it will only pull 3-4W. Most confusingly, even though it’s charging at sub-optimal speeds, the phone will actually claim to be “Charging rapidly,” which is a bit misleading. Of course, we had to try to confirm this behavior ourselves. We wouldn’t be the Android Police if we didn’t check and compare our results with other phones (and go a tiny bit overboard). If you don’t want to read about the testing methodology I used, feel free to jump down to the results section. Our own testing
“That Robin is clearly expired,” -David My analysis wasn’t strictly the most scientific. I wasn’t able to ensure that every phone was charged at precisely the same temperature, each warmed up at different rates, and my sample size was limited. But, I was able to reproduce the reported behavior on our Pixel 2 XL, and I did my best to test the other phones I had on hand with a similar methodology for comparison purposes. In all, we looked at cold (sub-16°C/61°F) and room temp (24°C/75°F) charging behavior, as measured by my Satechi USB-C Power Meter with the following phones:
All phones tested were put in the fridge until their internal battery temperature reported around 16°C/61°F degrees, at which point they were each plugged into the meter fed by the Pixel 2 XL USB-C PD 18W charger. Values were recorded, the phones were then disconnected and left to warm up until the internal battery temperatures reported above room temperature (24°C/75°F) values, at which point they were plugged in again and values again recorded. As much as I’d have liked to have the screen on to display reported battery temperature for better photos, the potential variance in charging speed with the screen on wasn’t acceptable. The trends from these results should be generally reproducible, but the conditions of the test weren’t precisely lab-controlled, so YMMV. For example, I made sure all the phones were below a 50% charge, but they weren’t all charging from exactly the same baseline in both tests, and numbers reported by the meter can vary a bit as the devices negotiate different power levels. Results
Note that these numbers are peak rates. In some cases, these values were not immediately reached or dropped over time. In all, most of the phones tested suffered a small drop in peak charging rates at colder temperatures, excluding the Nextbit Robin. By far the phone to see the largest change, though, was the Pixel 2 XL, with a difference of over 12W. Keep in mind, our testing methodology does leave a bit more accuracy to be desired. The sequential nature of the testing (i.e., from cold to warm the batteries did charge a tiny bit due to being plugged in for testing) and the effect of temperature on the battery itself (most devices reported varying levels of charge, less at cold temperatures and more at warmer) mean you can probably ignore the 3-4W difference seen by most of the phones. For example, I noticed that the OnePlus 5T showed a major drop in reported charge at colder temps that returned once it had warmed up, and below 60°F/15.5°C the reported battery temp was just incorrect. This video wasn’t part of the above testing, but it demonstrates the issue. Even if we accept a 3-4W margin of error for changes in reported charge affecting charging rates, the Pixel 2 XL stands apart from the pack in a distinctly negative way. For whatever reason, the phone charges significantly slower at lower temperatures. Worse, it doesn’t inform you of this, continuing to show a “Charging rapidly” indicator, even when it’s only charging at ~4W. Once we verified that the charging speed on the Pixel 2 XL was being misreported below certain temperatures, we reached out to Google for comment. Google confirmed with us that it’s investigating changes to the “Charging rapidly” language that appears on the Pixel 2’s lockscreen. So, hopefully, as part of a future update, your phone won’t tell you it’s charging quickly even when it’s actually not.
Powered by WPeMatico The post The Pixel 2 charges much more slowly below certain temperatures, but it doesn’t tell you that appeared first on Guaripete. | ||||||||||||||||||||||||||||||||||||||||||||||||||||||||||||||||||
| Posted: 18 Feb 2018 12:04 PM PST  Si eres usuario de Spotify lo más probable es que aproveches varios de sus sistemas de recomendación para conocer música nueva. Tienes el descubrimiento semanal, el Daily Mix, el radar de novedades, las radios, las listas de éxito, las playlists curadas por Spotify, etc. Y sin embargo, puede que todo esto no sea suficiente, o no te satisfaga del todo. Si es tu caso, un sitio como Playlists.net puede resultarte de mucha utilidad. En esta web puedes descubrir, generar y compartir listas de reproducción para Spotify y se integra perfectamente con el servicio. Listas de reproducción creadas por otras personas, no un algoritmo En Playlists.net las listas de reproducción pueden ser creadas y subidas por cualquiera que tenga una cuenta de Spotify, es decir que te vas a encontrar montones de playlists creadas por otros humanos como tú y no por un algoritmo. Desde su creación en el sitio se han subido más de 170.000 listas de reproducción. Puedes descubrir música navegando por las carteleras con las playlists más populares, o navegar por géneros y estados de ánimo como en el mismo Spotify. También cuentas con un buscador en el que puedes escribir cualquier cosa que te venga a la mente para encontrar una nueva playlist. Si quieres te puedes suscribir al newsletter ‘The List’ y recibirás nuevas listas de reproducción musical en tu bandeja de entrada todo el tiempo. Generación automática de playlists basadas en un artista Pero además de las listas creadas por otras personas, en esta web puedes generar listas de reproducción a partir del nombre de un artista. Los resultados, al menos en mi experiencia, son bastante buenos. Puedes elegir si quieres playlists de 10, 25 ó 50 canciones. La lista se genera automáticamente en cuanto ingresa el nombre de una banda o artista, puedes guardar la lista en tu cuenta de Spotify en un solo click, y no tienes que aceptarla a la primera, puedes regenerarla, o eliminar canciones que no te gusten antes de guardarla.  Como se trata de una comunidad, obviamente cualquier usuario puede usar su cuenta de Spotify para subir sus playlists al sitio. La integración con Spotify es de lujo, pues si iniciaste sesión solo debes elegir una de las listas que ya tienes en tu cuenta para compartir. Finalmente, también cuentan con una app para iOS y Android llamada playlsit a day y que te envía una lista de reproducción a diario desde tu móvil. Temas Powered by WPeMatico The post Si te aburriste de las recomendaciones de Spotify, en esta web puedes descubrir y generar mejores listas de reproducción appeared first on Guaripete. | ||||||||||||||||||||||||||||||||||||||||||||||||||||||||||||||||||
| View Image for Google Images extension for Firefox and Chrome Posted: 18 Feb 2018 12:04 PM PST  View Image is a browser extension for Google Chrome and Mozilla Firefox that adds a “view image” button to Google Images so that users can click on it to display the image directly in the browser. Google removed the view image button from its image search engine Google Images recently after the company came to an agreement with Getty Images. The button loads the image that is displayed directly. This gives users options to look at it more closely and to download it to the local device that they use. While it is still possible to to do after the removal of the button on Google Images — users can still right-click on the image and select “open image in new tab” or a similar option — view image made the whole process easier and many Internet users probably don’t know that they can open the image through the context menu. We suggest that you use a different image search engine such as Startpage instead. You can view images directly on Startpage and images do get opened through a proxy so that your IP address is not revealed to the site hosting the image. View Image extension
View Image is a new browser extension for Firefox and Chrome that adds the button to Google Images again. The extension should work in compatible browsers such as Opera or Vivaldi as well, and the functionality of it is identical. The extension does require access to your browsing data on all Google sites and the code is available on GitHub. Closing WordsGoogle users who used “view images” in the past regularly to load images in a standalone tab may use the View Image browser extension to restore the functionality. Most users don’t need it probably though as it is still possible to right-click on images to load them individually. Now You: Which site do you use for image searches?  Author Rating 2.5 based on votes Software Name View Image Software Category Browser Landing Page Powered by WPeMatico The post View Image for Google Images extension for Firefox and Chrome appeared first on Guaripete. |


| You are subscribed to email updates from Software Trending News. To stop receiving these emails, you may unsubscribe now. | Email delivery powered by Google |
| Google, 1600 Amphitheatre Parkway, Mountain View, CA 94043, United States | |
No comments:
Post a Comment