Software Trending News – Guaripete | Online Store |
- The Poof pet activity tracker makes helicopter pet parenting possible
- One of the Most Popular Portable Speakers is Near its All-Time Low
- iPhone Sales in China Fall as Domestic Manufacturers Take Lead
- Here is the Google Home Super Bowl Commercial
- El refugiado que se hizo un selfie con Angela Merkel ahora demanda a Facebook por las fake news
- How to sync your iPhone or iPad to iTunes
- Jawbone Fitness Bands Face an Uncertain Future As Company Plans Exit
- Siete alternativas gratis a Microsoft Office y Office 365
- Take control of your inbox again with a lifetime subscription to MailButler for just $35
- Forget your Apple ID password? Here's how to recover it for iCloud, iTunes, and App Store!
| The Poof pet activity tracker makes helicopter pet parenting possible Posted: 06 Feb 2017 08:10 AM PST
Poof’s pet activity trackers made me more of a helicopter pet parent and I’m thrilled! Poof makes two Bluetooth LE lightweight pet activity trackers, the Pea and the Bean. The devices track and chart your pet’s activity, calories, sleep, and rest. It’ll also give you feeding recommendations based on your pet’s activity. I got a chance to meet the folks behind Poof at CES this year and they showed me the Pea and Bean. I was impressed by the small size of both devices. Most pet trackers seem to be made for large dogs, but it was clear these would work for dogs of all sizes!
I recently got my hands (paws?) on two Poof Pea pet trackers, so I asked my crack team of pet product reviewers to take them for a spin! Look at ’em innocently laying there without a care in the world … little do they know I’m about to have concrete evidence of their utter laziness. Doggie bootcamp is around the corner! … or at least it would be if they didn’t have such powerful puppy dog eyes. Unboxing Poof’s Pea pet trackerPoof’s Pea pet tracker comes in a little box with the Pea tracker front-and-center peeking through the box. Opening it up reveals quite a little collection of goodies! Along with the Pea tracker itself, you’ll find a button battery (CR2032, if you’re curious), a metal opening tool, a tag ring, and a collar holster (more on those last two in a moment). The metal opening tool was a nice touch, though have to admit I didn’t realize that’s what I was supposed to use it for when I first unboxed the Pea. I set about prying open the tracker with my fingernail, and it’s not easy that way. See, the Pea has a rubber gasket along the edge to keep things sealed up while your pet’s outside rolling around in water, mud, and who knows what else.
As I mentioned before, the Poof Pea comes with two options for securing the tracker to your pet. You can either use the tag ring (it snaps around the tracker) to hang the tracker from your pet’s collar, or you can use the rubber collar holster (you slip the tracker into it) which lets you slide the tracker onto your pet’s collar. The ring is more dangly and potentially noisy. The holster moves around a lot less, but I’ve seen it slide up and down my pups’ collars over time. I chose to use the holster for both of my pups, because they’re small dogs. When Henri (gray chihuahua) puts his nose to the ground, his dog tags drag across the floor — I figured he’d rather not have more unfamiliar noise sliding around underneath his chin.
Strike a pose!I promised my crack team I’d post some glamour shots of them wearing their Poof Peas, so here’s that!
Using the Poof appYour interactions with the Poof tracker happen over Bluetooth LE via the free Poof app. Up to 15 days of data is stored on the Poof tracker, so as long as you sync the tracker with your phone within 15 days, you’ll be able to get all your pet’s activity data.
Pairing the PeaIn order to get data from the Pea and connect it to a specific pet, you’ll have to pair the device with your phone. After you’ve signed up for an account within the app, you’ll be asked to add a pet. Simply tap Add pet and fill in all the necessary information (name, photo, gender, breed, etc.) to add ’em!
After you’ve filled out your pet’s profile, it’s time to add your Poof pet tracker! Just tap Add device and make sure the Poof tracker is nearby. You’ll see a screen that says Searching… if you’ve done everything correctly.
From that point on, you’ll simply tap the orange sync button in the bottom right corner of the app when you want to sync your pet’s activity data. Remember! You’ll need to have the Poof tracker nearby to sync, as syncing happens over Bluetooth LE I am both pleased and surprised to say I’ve yet to have any connectivity issues with the app and the Poof tracker. Every time I’ve hit the sync button, the device has connected to my phone and shot over all the activity data of my canine companions without fail.
Tracking my pets
The main reason you’d want to have a Poof Pet Tracker of your very own is so you can — as you might imagine — track your pet’s activity. The Poof Pet tracker monitors your pet’s Activity and separates it into three categories: high, moderate, and light. It also monitors your pet’s Rest and separates that into three categories: deep, light, and wake. The Poof app will take all of this information and turn it into a score that you can use as an overall trend for your pet’s activity. I love being able to tap the History button (bottom left corner of the app; looks like a calendar) and see the charts and graphs of my pets’ activity over the course of the week, the month, and even the year. I’ve become a little helicopter parenty about it. I’m regularly chasing down my puppers to sync up their activity so I can see what kind of movement they got in on any given day. We’re still looking at 3:1 rest over activity … like dog-dad like puppers, eh?
One of the cool features baked right into the Poof app is a food recommendation engine. You can search through the food database and get a recommendation on how much you should be feeding your pet based on their activity!
Social networkingThe Poof app also lets you get social! Along with keeping track of where your pet’s score ranks in comparison to other puppers (or cats), you can also post photos and text which show up in the app’s NewsFeed. I experienced a few hiccups with this feature as the server seemed to be overloaded at times, but I was eventually able to get my photos uploaded. Folks can comment on your posts and you can comment on theirs. In a cute, subtle tweak to the typical social media interaction, you don’t “like” others’ posts — you give them treats. The app notifies you to let you know you’ve received a treat from another user. It’s adorable. I’d argue the social networking feature is the least important part of the app, given that I can almost always get more Likes on Instagram for my pupper shots than I’ll ever get Treats. Then again, I guess it just depends on what you’re wanting to get out of social media posts … some of us (read: me) like to see praise showered on our little loved ones. Since Poof is still relatively new, there aren’t as many users on the social media platform, so you won’t see as much praise and interaction.
There is one super-nifty bit of functionality tied to the social networking: Lost Pet Alerts! The app and tracker rely on the community of Poof Pet users. If your little doggo (or cat) ever get lost you can mark them lost within the app. Then, any time your pet comes into range of another user’s phone, you’ll get a notification letting you know where your pupper (or kitten) was last spotted! Sure, it relies on a mesh network of Poof users, but it’s a pretty nifty idea. Not gonna lie, it has me thinking about gifting a couple Poof trackers to pet-owners in my neighborhood! Pay it forward with PoofLastly I want to touch on a super cool initiative from Poof. The company donates all of its proceeds from the Poof Pet trackers to GreaterGood.org, a registered 501(c)3 public charity that focuses, in part, on the rescue and care of animals. From Poof’s website:
On top of monitoring the health, happiness, and safety of your pets, you’re also giving back in a way that helps other pets. It’s a really nifty gesture that makes me happy to have my puppers sporting Poof trackers on their collars. Get your own Poof!Are you a pet owner? If you’d like to get a Poof Pet tracker of your very own, you can find ’em over on Poof’s website. If you choose to pick one up, shoot me a tweet or leave a comment below — I’d love to hear about your experience with the tiny, feature-packed tracker! Powered by WPeMatico The post The Poof pet activity tracker makes helicopter pet parenting possible appeared first on Guaripete | Online Store. |
| One of the Most Popular Portable Speakers is Near its All-Time Low Posted: 06 Feb 2017 08:10 AM PST  Amazon is offering the UE Megaboom speaker for $189.99, a 24 percent discount and $10 off the lowest price we've ever seen. UE Megaboom Portable Speaker The UE MegaBoom speaker is considered by many to be the best portable wireless speaker you can get. Not only can it deliver incredible, 360-degree sound and bass due to its shape, but it also happens to be IPX7 waterproof compliant which means you can take it virtually anywhere and not worry about it getting damaged. The UE Megaboom is so loved that it's received a 4.3-star rating on over 1,000 reviews. Here's what one reviewer had to say:
Many other owners feel the same way, and it's clear that this isn't a fluke. People really love this speaker. Other features include Alexa support, a 20-hour rechargeable battery, 100-ft Bluetooth range, the ability to connect up to 50 UE speakers using the UE app, and much, much more. Powered by WPeMatico The post One of the Most Popular Portable Speakers is Near its All-Time Low appeared first on Guaripete | Online Store. |
| iPhone Sales in China Fall as Domestic Manufacturers Take Lead Posted: 06 Feb 2017 08:10 AM PST  In all of 2016, iPhone sales in China fell for the first time. This came as Apple celebrated record iPhone sales overall during the holiday quarter, according to Bloomberg.  For 2016, iPhone sales in China totaled 44.9 million units, which represented a loss of 23 percent year over year. The decline pushed Apple's market share in the country to under 10 percent for the first time in two years. Apple's loss came as Chinese-based companies dominated in the world's largest consumer market. In 2016, Oppo, Huawei, and Vivo accounted for 48 percent of shipments in the country. According to a new report from IDC, No. 1 Oppo's shipments totaled 78.4 million units in 2016, up from 35 million the year before. Huawei followed with 76.6 million units. Vivo rounded out the top three with 69.2 million units shipped. Apple ranked No. 4. Overall, 467.3 million smartphones units were moved in China last year, up 8.7 percent from 2015. Between October and December 2016, Apple sold 14.5 million iPhones in China, compared to 24.5 million for Oppo, 22.9 million for Huawei, and 21.7 million for Vivo. Apple's iPhone sales in China could pick up later this year with the arrival of the "iPhone 8." "Apple's 10-year anniversary iPhone will also likely attract some of the high-end Android users in China to convert to an iPhone," IDC said. On Jan. 31, Apple announced record iPhone sales of 78.3 million for the company's first fiscal quarter of 2017. This came as the iPhone maker announced quarterly revenue of $78.4 billion and profit of $17.9 billion. Powered by WPeMatico The post iPhone Sales in China Fall as Domestic Manufacturers Take Lead appeared first on Guaripete | Online Store. Related posts: How to transfer Pokémon and get extra Candy in Pokémon Go How to transfer Pokémon and get extra Candy in Pokémon Go  14 cursos para aprender a crear videojuegos desde cero 14 cursos para aprender a crear videojuegos desde cero  Gamers Haven't Been Rushing to Pay for Super Mario Run Gamers Haven't Been Rushing to Pay for Super Mario Run Related posts brought to you by Yet Another Related Posts Plugin. |
| Here is the Google Home Super Bowl Commercial Posted: 06 Feb 2017 08:09 AM PST  Yesterday's Super Bowl LI was one for the ages, especially those last few minutes. From the massive lead that was eventually squandered to the ridiculous Julio Jones catch that we all already forgot about because Julian Edelman made an even more ridiculous catch minutes later, to the sack taken by Matt Ryan that pushed the Falcons out of field goal range, allowing Tom Brady and the boys to send the game into the first ever Super Bowl over time. It was everything a football fan can hope for, as long as you aren't the ultimate Patriots hater. But before we got to all of that craziness, there were Super Bowl LI commercials to be consumed. This was actually a pretty good year for commercials as well, at least I thought. Google's spot for Google Home (our review) happened to be the first (right?) out of the gate and it delivered in familiar Google Home commercial fashion. In case you missed it, it's embedded above. Any other commercials that stood out as good? Here is the Google Home Super Bowl Commercial is a post from: Droid Life     Powered by WPeMatico The post Here is the Google Home Super Bowl Commercial appeared first on Guaripete | Online Store. Related posts:How to transfer Pokémon and get extra Candy in Pokémon Go 14 cursos para aprender a crear videojuegos desde cero Gamers Haven't Been Rushing to Pay for Super Mario Run Related posts brought to you by Yet Another Related Posts Plugin. |
| El refugiado que se hizo un selfie con Angela Merkel ahora demanda a Facebook por las fake news Posted: 06 Feb 2017 08:09 AM PST  En septiembre de 2015, el refugiado sirio Anas Modamani se hizo un selfie con Ángela Merkel, la canciller alemana, en una visita al espacio habilitado para ellos en Berlín. Al mismo tiempo, convertía a este refugiado en objeto de conspiraciones de la ultraderecha germana. Varias noticias falsas lo relacionaban con los ataques terroristas de Bruselas en 2016, y después a los del mercado de Navidad de Berlín. Y otra más lo declaraba sospechoso de asaltar a un sintecho. ¿Qué va a hacer Anas Modamani? Lo tiene muy claro: demandar a Facebook, según se informa en The Washington Post. La demanda judicial, que pasaría a los juzgados hoy lunes, busca hacer que la red social actúe de forma rápida y preventiva, que elimine todo el material que le perjudica, que son un medio de comunicación y que son responsables de lo que publican.
El pasado mes de enero se anunciaba que el filtro de noticias falsas llegaba a Europa, empezando por Alemania. Por otra parte, el país lleva meses apretando las tuercas a Facebook con el asunto de las noticias falsas. Las leyes del territorio contemplan de cerca la privacidad personal y tienen muy poca tolerancia a la propaganda, con lo que se han convertido en duros críticos del gigante social. Con respecto a aclarar si son un medio de comunicación o no, primero habrá que esperar a que lo haga Mark Zuckerberg, que ha cambiado mucho su opinión con respecto a este asunto en diversas ocasiones. Por ahora la empresa se compromete a combatir el problema, a la par que mantienen que su función como plataforma es sólo compartir información. Lo que ha pasado con el selfieEn el caso de Modamani, la demanda busca obligar a Facebook a borrar posts falsos muy específicos reportados por los usuarios, y también adoptar filtros especiales que busquen por la red social y que eliminen todas las referencias a dicho contenido. El abogado del refugiado, Chan-jo Jun, dijo que aunque la red social asegura haber borrado todos los posts que atacan a su cliente, encontró republicaciones de las imágenes la semana anterior. Las reclamaciones se centran en tres imágenes concretas que Jun asegura que todavía circulan por Facebook. Una muestra el selfie que se hizo su cliente con Merkel, junto a una imagen de seguridad de un grupo de jóvenes sospechosos de intentar prenderle fuego a un sintecho en el metro de Berlín. La cara de uno de ellos está rodeada por un círculo y se dice falsamente que es Anas Modamani. Otra publicación que circula por Facebook es un collage fotográfico, que coloca a Modamani y Merkel con el mercado de Navidad de Berlín después del ataque terrorista. En la foto se puede leer “los muertos son responsabilidad de Merkel”. Otra publicación identificaba a Modamani como parte activa de los ataques de Bruselas, alegando que Merkel se había “tomado un selfie con un terrorista”. La imagen se ha republicado unas mil veces según el abogado de Modamani, Chan-jo Jun. En un comunicado de prensa, desde Facebook se decía que ya se “había eliminado el acceso al contenido” que los representantes legales del refugiado reportaron, con lo que no creen que “sea necesario tomar acciones legales, o que sea la forma más efectiva de resolver la situación”. Vía | The Washington Post También te recomendamos – Powered by WPeMatico The post El refugiado que se hizo un selfie con Angela Merkel ahora demanda a Facebook por las fake news appeared first on Guaripete | Online Store. |
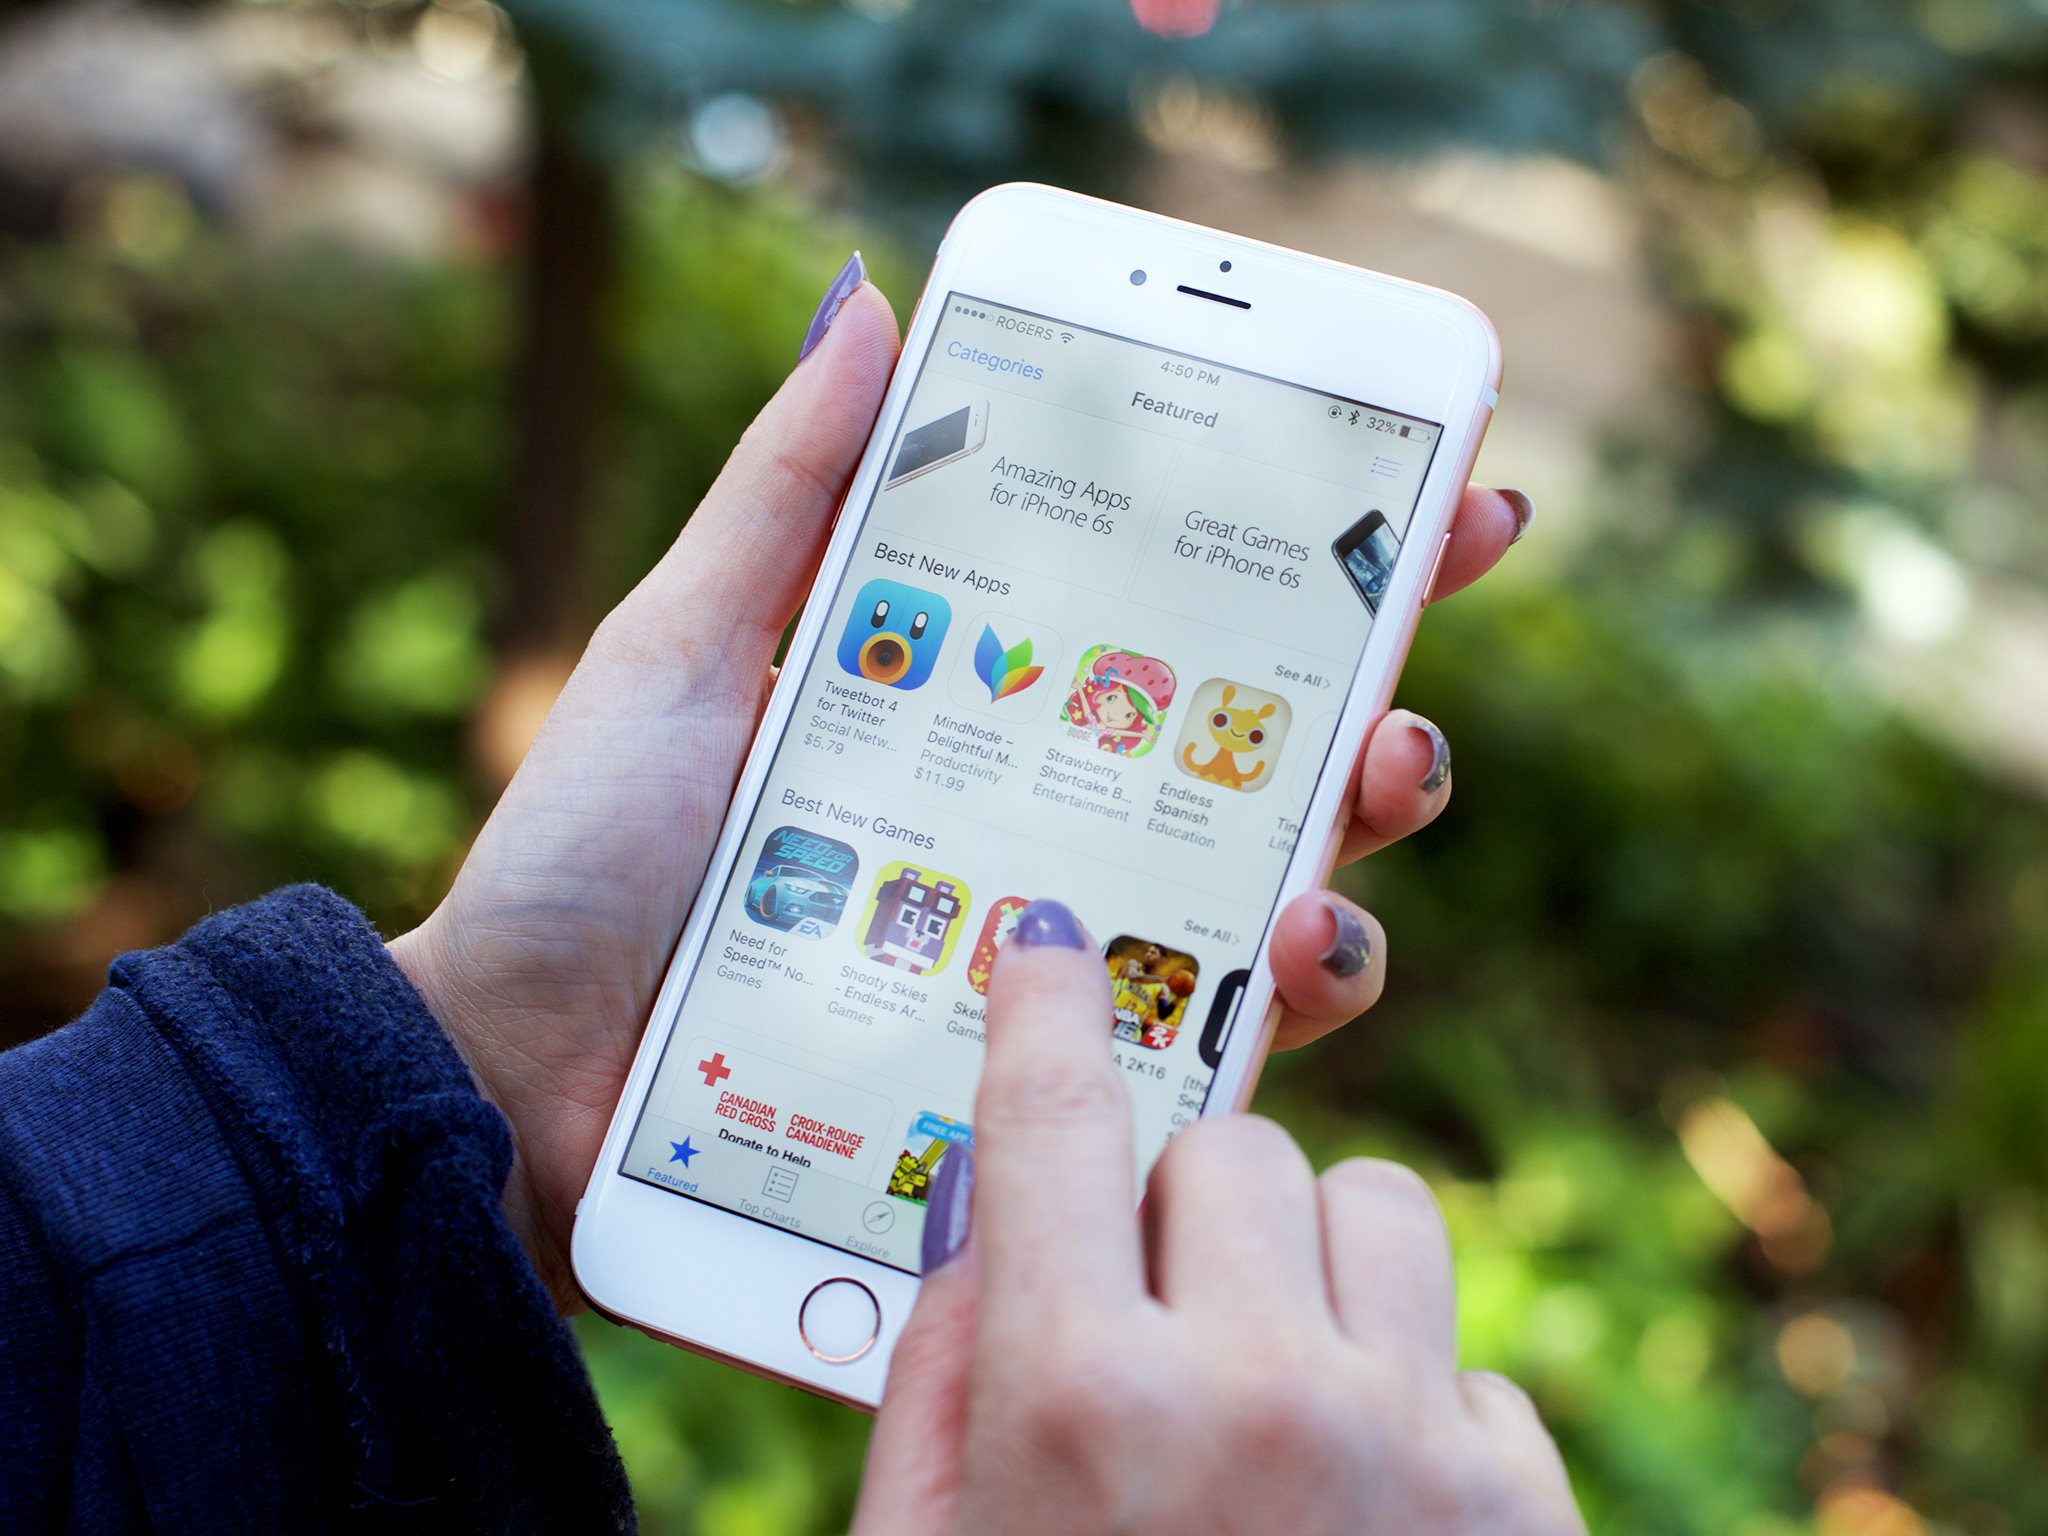
| How to sync your iPhone or iPad to iTunes Posted: 06 Feb 2017 07:15 AM PST 
Learn how to sync your iPhone or iPad to your Mac with iTunes. While you’ve been able to use an iPhone and iPad PC-free since the days of iOS 5, plugging in is still an option for those that don’t trust iCloud and other such services for syncing their information between an iOS device and a Mac or PC. And aside from syncing your device and backing it up, there’s a myriad of things that you can sync through iTunes. Follow this guide to learn how to syncing apps, media, and more to your iPhone or iPad with iTunes.
How to sync your iPhone or iPad to iTunes with a cableThis one’s pretty basic. Just plug in and keep iTunes and your phone in sync.
How to set up Wi-Fi sync to iTunes for your iPhone or iPadOf course, nowadays you don’t even need to physically plug in your iPhone or iPad to sync with iTunes.
You can then sync your iPhone over Wi-Fi like so:
How to sync apps to your iPhone or iPad with iTunesKeep your device’s apps in sync, removing and installing them without having to paw at your iPhone or iPad.
How to transfer files between iOS apps and your MacYou can also move files between individual iOS apps and your Mac or PC.
How to sync media to your iPhone or iPad with iTunesYou can sync all sorts of media from iTunes to your iPhone or iPad, such as music, movies, TV shows, books, and podcasts.
How to sync photos to your iPhone or iPad with iTunesDon’t like iCloud Photo Library? No problem. Sync photos from your Mac or PC to your iOS device in iTunes.
How to sync contacts and calendars to your iPhone or iPad with iTunesIf you don’t like to entrust your contacts and calendars to a cloud service provider like Apple or Google, you can sync them manually with iTunes.
Questions?Be sure to tell us in the comments if you have any other questions about syncing your iPhone or iPad to iTunes. Powered by WPeMatico The post How to sync your iPhone or iPad to iTunes appeared first on Guaripete | Online Store. Related posts: [Update: Fix is live] AirDroid Beta 4.0.0.2 fixes major security issues, official rollout expected soon [Update: Fix is live] AirDroid Beta 4.0.0.2 fixes major security issues, official rollout expected soon  ¿Anclado en Windows 7? Esta web te deja probar Windows 10 desde tu navegador ¿Anclado en Windows 7? Esta web te deja probar Windows 10 desde tu navegador  Samsung Will Reveal Galaxy Note 7 Recall Findings on Sunday Night Samsung Will Reveal Galaxy Note 7 Recall Findings on Sunday Night Related posts brought to you by Yet Another Related Posts Plugin. |
| Jawbone Fitness Bands Face an Uncertain Future As Company Plans Exit Posted: 06 Feb 2017 07:15 AM PST  Jawbone fitness bands will soon be no more as the company preps to leave the consumer market after months of uncertainty, according to TechCrunch.
 In what's being described as a "pivot," the San Francisco, California-based company is expected to move away from "low-margin fitness bands sold directly to consumers, to a high-margin business to business to consumer model: a health product and accompanying set of services sold primarily to clinicians and health providers working with patients." As part of the move, Jawbone is hoping to raise capital from its current list of backers and new ones from the wider medical sector. Jawbone, known for its fitness bands and Bluetooth speakers, has been dealing with sales difficulties in recent months. In June 2016, the company noted that it wasn't planning to exit the consumer market. In a blog post at the time, Jawbone CEO Hosain Rahman said that his company remained "committed to innovating in and building great wearables products." As a previous Jawbone customer, I'm sad to see it exit the consumer market. As I first noted in April 2016 and still believe today, the Jawbone health and wellness app is vastly superior to other health apps on the App Store, including Apple's Health app. Jawbone's likely exit from the consumer market comes just months after Pebble shuttered. In that case, the company was purchased by Fitbit. Jawbone fitness bands remain on sale through the company's website. Powered by WPeMatico The post Jawbone Fitness Bands Face an Uncertain Future As Company Plans Exit appeared first on Guaripete | Online Store. |
| Siete alternativas gratis a Microsoft Office y Office 365 Posted: 06 Feb 2017 07:15 AM PST  Microsoft Office es una de esas herramientas que llevan tanto tiempo entre nosotros que le ha dado nombre a las herramientas ofimáticas en general, y ya nos referimos al resto de suites ofimáticas como “el Office de tal empresa”. Pero tiene un pequeño problema, que sigue siendo una aplicación de pago que puedes conseguir por 7 euros al mes con Office 365 o un pago único de 149 en la versión Office 2016. Eso hace que muchos se la jueguen descargándose de redes P2P versiones ripeadas de dudosas procedencias. Pero esto no es necesario, ya que tienes a tu disposición varias alternativas gratuitas perfectamente legales para sustituirlo. Hoy os vamos a hablar de siete de ellas para que tengas varias dónde elegir.
LibreOffice, innovadora y de código abiertoA día de hoy, LibreOffice sea una de las mejores alternativa que te puedas encontrar en la red. De hecho, en su última versión ofrece por primera vez la posibilidad de colaborar en línea para editar un documento, convirtiendo a la 5.3 en una de las versiones más ricas en características de la historia de la aplicación. La suite iguala muchas de las herramientas de Office, y cuenta con un editor de textos al estilo Word, una hoja de cálculos, una aplicación especial para operaciones matemáticas, otra para bases de datos, un editor de gráficos y una aplicación especial para presentaciones. Y claro, sus dos mayores virtudes siguen siendo que es gratuita y de código abierto. OpenOffice sigue manteniéndose a floteY ya que estamos hablando de LibreOffice, conviene no olvidar que nació como una escisión del proyecto OpenOffice, el cual de hecho todavía sigue operativo aunque sin tanto ritmo en cuanto a sus versiones y novedades. Aún así, en su página web también te lo puedes descargar gratis por si quieres darle una oportunidad. Google Docs, la mejor alternativa onlineGoogle Docs y el resto de la suite ofimática de Google que podemos encontrar en Google Drive se han convertido en una de las más sencillas y completas alternativas a Office. Es gratis y es online, lo que facilita enormemente el trabajo colaborativo, y tiene versiones móviles para que puedas editar documentos desde cualquier lugar. Sin embargo la suite tiene dos primeros inconvenientes. El primero es que no tiene tanta variedad de aplicaciones como otras, aunque va creciendo, y el segundo es que carece de una versión descargable para escritorio, lo que lo hace demasiado dependiente de que estés conectado. Aún así, sigue siendo una buena alternativa, se integra con plataformas como Slack, y sólo necesitas tener una cuenta de Google para utilizarla. WPS Office, la experiencia más cercana a OfficeWPS Office, anteriormente conocida como como Kingsoft Office, fue considerada siempre como “el office chino” debido a su enorme parecido con la suite de Microsoft. No es un proyecto de software libre o código abierto, pero pese a ser propietario sigue siendo gratuito para todo el que lo quiera usar. Además, es compatible con DOCX y XLSX para que no pierdas ni un mínimo dato al abrir archivos de la suite de Microsoft. Es una suite básica que apenas tiene editor de texto, hoja de cálculos y presentaciones, pero poco a poco va mejorando, y en su última versión incorpora sincronización en la nube con espacio gratuito de 1 GB. Es multiplataforma con versiones oficiales para Windows, GNU/Linux, Android e iOS, y además de la gratuita incluye una edición empresarial que puedes comprar por 80 dólares. Calligra, con personalidad propiaCalligra es una aplicación un poco más centrada en ofrecernos herramientas de diseño, aunque también tiene las básicas necesarias como para ser considerada una buena suite ofimática. Se trata de una bifurcación de Kingsoft Office compatible con Windows, macOS, Linux, FreeBSD, y que lleva siendo desarrollada desde 2010. Utiliza el formato ODF (Open Document Format) para ser compatible con el resto de aplicaciones ofimáticas que apuestan por formatos abiertos. Tiene aplicaciones de diseño de flujos y diagramas, gráficos vectoriales y presentaciones, pero también otras clásicas como un gestor de tareas, una hoja de cálculo o un editor de documentos de texto. SoftMaker FreeOffice, básica pero eficienteSi quieres otra suite gratuita, totalmente compatible con los formatos de Microsoft, capaz de exportar documentos en EPUB y PDF, con tablas dinámicas, hojas de cálculo y animaciones y transiciones basadas en DirectX, SoftMaker FreeOffice es una herramienta que te interesará. Tiene versiones para Windows, GNU/Linux y Android. Es una suite básica con un procesador de texto, hojas de cálculo y una herramienta de diapositivas. Tres únicas herramientas que serán más que suficientes para el usuario convencional, pero que quizá se le queden cortas a los más avanzados. También tiene una versión de pago con diccionario de sinónimos, mejor interfaz y compatibilidad con formatos más modernos de Microsoft. Office Online, ¿por qué conformarse con otros?Ante el empuje de alternativas como Google Drive, y siendo conscientes de que no todos pueden pagarse la suscripción a Office 365, Microsoft decidió hace unos años lanzar Office Online. Se trata de una versión online del clásico Office, pero que es totalmente gratuita para todo el que tenga una cuenta de Microsoft. Las ventajas son las mismas que las herramientas de Google y sincronización automática guardando los documentos en OneDrive para acceder a ellos desde cualquier ordenador independientemente del sistema operativo. Además es Office, por lo que no habrá ningún problema de compatibilidad. Y la parte negativa la de siempre, que para jugar offline necesitarás la suite de pago. Imagen | Howard Lake También te recomendamos – Powered by WPeMatico The post Siete alternativas gratis a Microsoft Office y Office 365 appeared first on Guaripete | Online Store. Related posts: Clement Lefebvre pide ayuda a Kubuntu para mantener Linux Mint KDE Clement Lefebvre pide ayuda a Kubuntu para mantener Linux Mint KDE  Alemania sigue apretando a Facebook: 500.000 euros de multa por cada noticia falsa y mensaje de odio Alemania sigue apretando a Facebook: 500.000 euros de multa por cada noticia falsa y mensaje de odio  Digital Offers: Grab a lifetime subscription to MailButler for just $35 Digital Offers: Grab a lifetime subscription to MailButler for just $35 Related posts brought to you by Yet Another Related Posts Plugin. |
| Take control of your inbox again with a lifetime subscription to MailButler for just $35 Posted: 06 Feb 2017 06:43 AM PST Managing email is not an easy thing these days. So much of our communication is done through email that it becomes very easy to fall behind or start to miss things. Don’t forget to reply to an important email or miss out on a reply because you got sidetracked, and look for a better way to make email work for you. Take control of your inbox again! Learn More Meet MailButler Professional a great way to keep on top of everything, and make email work better for you. You’ll be able to upload emails to the cloud, schedule emails to be sent at certain times and so much more to keep on top of all your emails with ease.
Make email work better for you! Learn More Normally, this would set you back nearly $1,500, but right now you can pay just a small fraction of that. Priced at just $35, you can’t go wrong with MailButler if you need some help with managing your email. Whether you need something to snooze your emails until later, or undo emails that you sent by accident, this is a great way to do it for an affordable price. Powered by WPeMatico The post Take control of your inbox again with a lifetime subscription to MailButler for just $35 appeared first on Guaripete | Online Store. Related posts:Another Company Is Bearish on Apple's Long-Term Future The First Apps to Install on Apple TV Save $9 on this protective iPhone 7 case today! Related posts brought to you by Yet Another Related Posts Plugin. |
| Forget your Apple ID password? Here's how to recover it for iCloud, iTunes, and App Store! Posted: 06 Feb 2017 06:43 AM PST 
Your Apple ID can be used for iCloud, iTunes, and the App Store, but if you forget your password, you’ll need to reset it! Updated February, 2017: Updated screenshots for iOS 10 and added steps for two-factor authentication. Whether you want to log into iCloud on a new device or download something from iTunes or the App Store for the first time in a while, you’ll need your Apple ID password to get it done. If you can’t remember your password, you can reset it using the web browser on your iPhone, iPad, or Mac. If you don’t even remember your Apple ID, you can try to recover that too!
How to recover your Apple ID password using email or security questionsIf you can’t remember your password you can get reset instructions from Apple. If you have a recovery email registered—a secondary account you’ve set up and verified—you can get the instructions emailed right to you. If you have security questions set up, you can reset right on the web.
Reminder: If you do use security questions, make sure the answers aren’t easily guessable or researchable. It’s best to simply fill them in with random characters and store them in your password manager. How to recover your Apple ID password using two-step authenticationApple’s old two-step authentication is still functioning, so if you use it, that’s how you’ll need to recover your Apple ID password.
You can then create a new password and, hopefully, store it in your password manager so you don’t need to recover it again. How to recover your Apple ID password using two-factor authentication
Follow the on-screen instructions to recover your Apple ID password. How to recover your Apple IDIf you can’t even remember which email or username your set up for your Apple ID, you can try and find that out from Apple as well.
Apple will try to find an Apple ID associated with your email addresses and give you the opportunity to recover the associated password over email or via security questions. Powered by WPeMatico The post Forget your Apple ID password? Here's how to recover it for iCloud, iTunes, and App Store! appeared first on Guaripete | Online Store. Related posts:Another Company Is Bearish on Apple's Long-Term Future The First Apps to Install on Apple TV Save $9 on this protective iPhone 7 case today! Related posts brought to you by Yet Another Related Posts Plugin. |


 All I know is what I like and I don't think one has to be a musician to know what sounds good. This speaker sounds great to my ears, so all I can to you is…Buy this speaker It is expensive but well worth the money. Sit back and enjoy what has now become my favorite Bluetooth speaker.


| You are subscribed to email updates from Software Trending News. To stop receiving these emails, you may unsubscribe now. | Email delivery powered by Google |
| Google Inc., 1600 Amphitheatre Parkway, Mountain View, CA 94043, United States | |
No comments:
Post a Comment